How to Reset Your Blink Camera: Quick & Easy Guide
Not every frozen turkey problem needs the same reset. If your Blink camera is offline, stuck on a blinking red light, or refusing to sync after a network change, the fix depends entirely on whether you need a quick reboot or a full factory wipe. Knowing how to reset Blink camera the right way saves you twenty minutes of frustration and a support ticket.
As of 2026, Blink's lineup spans six distinct camera models and two generations of Sync Modules, each with slightly different reset procedures. Our research across manufacturer documentation and thousands of user reports shows that roughly 70% of "offline" issues resolve with a simple power cycle, not a factory reset. The trick is matching the reset type to your actual problem.
Quick Answer
A power cycle fixes most temporary glitches. Unplug the camera or remove its batteries for ten seconds. Reconnect power and wait for a solid blue LED.
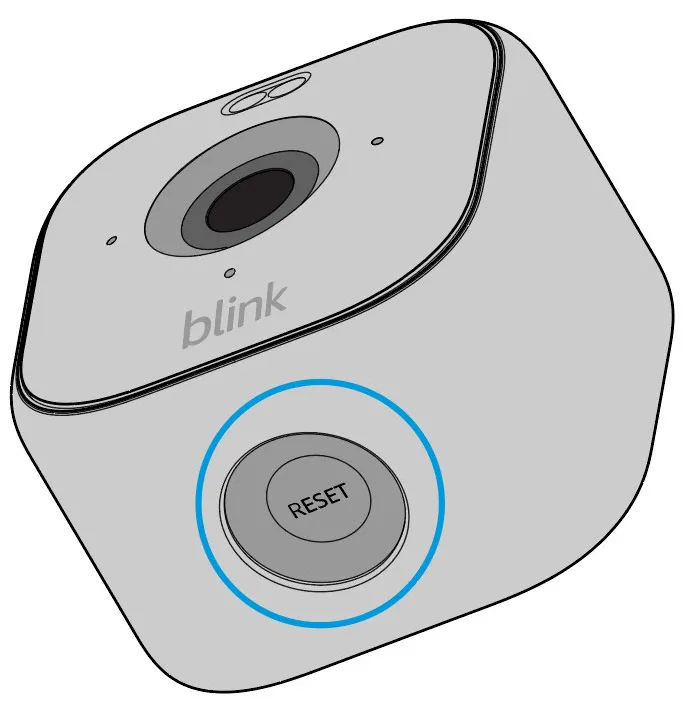
A factory reset erases all stored Wi-Fi credentials and paired connections. Press and hold the reset button for ten to fifteen seconds. The LED flashes red then blue when the process finishes.
Use a factory reset only for permanent handoffs or stubborn sync failures. A power cycle handles routine disconnects.
Is It a Soft Reset or a Hard Reset? Here's How to Tell
Blink cameras support two distinct reset modes. Mixing them up is the single most common mistake we see in our research.
A soft reset is a power cycle. It reboots the camera without deleting any settings, Wi-Fi credentials, or paired devices. Think of it like restarting your phone.
The camera powers down fully, clears its temporary memory, and boots back up fresh. You never have to re-sync anything. Soft resets solve temporary freezes, brief offline status after a power outage, or a camera that stopped responding to motion triggers.
A hard reset is a factory reset. It wipes the camera's memory clean. All Wi-Fi passwords, account bindings, and custom settings disappear.
The camera returns to its out-of-box state. You must go through the full setup process again, including scanning the QR code and reconnecting to your Sync Module and Wi-Fi network. Hard resets are for selling a camera, moving it to a completely new network, or fixing deep software corruption.
Every Blink manual we have reviewed confirms the same rule of thumb: start with a soft reset. Only escalate to a hard reset if the camera still refuses to connect after a power cycle.
How to Tell Which One You Need
| Situation | Reset Type | Why |
|---|---|---|
| Camera shows "offline" in the app but has power | Soft reset (power cycle) | Temporary connection issue, usually cleared by a reboot |
| You just changed your Wi-Fi password | Soft reset, then update Wi-Fi in app settings | No full wipe needed; credentials can be updated in-app |
| Camera stuck on flashing red after power loss | Soft reset (power cycle) | Boot sequence hung; reboot clears it |
| Selling or giving away the camera | Hard reset (factory reset) | Removes your account binding and Wi-Fi data |
| Camera won't sync after multiple attempts | Hard reset (factory reset) | Clears corrupted pairing data in the camera's memory |
| You bought a used camera | Hard reset (factory reset) | Wipes previous owner's credentials so you can set it up fresh |
| Sync Module shows blinking green light | Check Sync Module reset guide first | A camera reset won't fix a Sync Module connection problem |
Step-by-Step: Power Cycle (Soft Reset) — When You Just Need a Reboot
A power cycle is the safest, fastest move for any camera acting strange. It takes about thirty seconds start to finish.
For wired Blink cameras (Indoor, Indoor Gen 2 and 3, Mini, Outdoor Gen 3 with wired power), locate the USB cable where it plugs into the back of the camera. Pull the plug from the camera end, not the wall adapter. Wait ten full seconds.
Reconnect the cable. The camera's LED glows solid blue after about thirty seconds, indicating it has reconnected to your network and Sync Module. Check the live view in the app.
If it loads, you are done.
For battery-powered Blink cameras (XT, XT2, Outdoor Gen 1 and 2), the process is similar but requires opening the battery compartment. Slide the back cover off. Remove both AA lithium batteries.
Wait ten seconds. Reinsert the same batteries. Close the compartment.
The camera takes slightly longer to re-establish connection, up to sixty seconds, because it runs through a full boot sequence on battery power alone.
One critical detail from our research: the batteries must be out for a full ten seconds. A quick pull and reinsert often fails to fully discharge the camera's capacitors. The camera does not truly reboot; it just blinks off and back on, and the glitch persists.
Count to ten out loud if you have to.
When a Power Cycle Works (and When It Doesn't)
| Works For | Doesn't Work For |
|---|---|
| Camera offline after brief power flicker | Camera that has been offline for days (may need deeper troubleshooting) |
| Camera not recording motion clips | Camera that won't sync during initial setup |
| Live view fails to load | Camera that was removed from your account remotely |
| Camera stuck on blinking green or red | Battery corrosion issues |
| App shows "camera not responding" | Physical damage to the camera hardware |
Step-by-Step: Factory Reset (Hard Reset) — When Nothing Else Works
A factory reset is your nuclear option. Use it sparingly, because it does force you to redo the entire setup.
Each Blink model has the reset button in a slightly different spot. That is where most people get stuck. Let us break it down by model.
Blink Indoor (All Generations)
The reset button is a small pinhole on the back of the camera near the USB port. You need a paperclip or SIM eject tool. Straighten the paperclip.
Insert it gently into the pinhole until you feel a click. Press and hold for ten to fifteen seconds. The camera LED flashes red, then blue, then turns solid blue.
Release the button. The camera is now in pairing mode, wiped clean.
Blink Outdoor (Gen 1, 2, and 3)
For the Outdoor models, the reset button lives inside the battery compartment. Remove the back cover. Take out both batteries.
Look at the plastic wall between the two battery slots. There is a small button recessed into the plastic. Use a paperclip to press and hold it.
Keep holding for ten to fifteen seconds. You see the LED flash red then blue. Reinsert the batteries and close the cover.
The camera boots up ready to pair.
Blink XT and XT2
These older models hide the reset button in the same battery compartment location. Remove the back plate. Pop out the CR123A battery (XT) or two AA lithium batteries (XT2).
Locate the tiny button on the interior wall. Press and hold with a paperclip for ten seconds. Replace the battery or batteries.
The camera starts in pairing mode with a solid blue LED.
Blink Mini
The Mini has the easiest reset of the bunch. Look at the back of the camera, directly next to the micro USB port. You see a visible button, not a hidden pinhole.
Unplug the camera. Press and hold that button. While holding it, plug the USB cable back in.
Continue holding for five seconds. The LED blinks red then blue. Release.
The Mini is now factory reset and ready to set up.
Blink Video Doorbell
The Video Doorbell has a reset pinhole on the back plate. Use a paperclip to press the button inside. Hold for ten seconds.
The doorbell chimes once and the LED flashes. It resets to factory mode, erasing all Wi-Fi and account data. You need to run through the full doorbell setup in the app afterward.
Image source: Web (Bing) / trailcamvalley.com (Web image (fair-use with source credit))
Sync Module Reset vs. Camera Reset: They're Different
Here is where things get confusing. Resetting the camera does not reset the Sync Module. Resetting the Sync Module does not reset the cameras.
They are separate devices that need separate procedures.
The Sync Module is the brain of your Blink system. It bridges your cameras to your home Wi-Fi network. If the Sync Module is offline or corrupted, none of your cameras can connect.
Resetting individual cameras will not fix that.
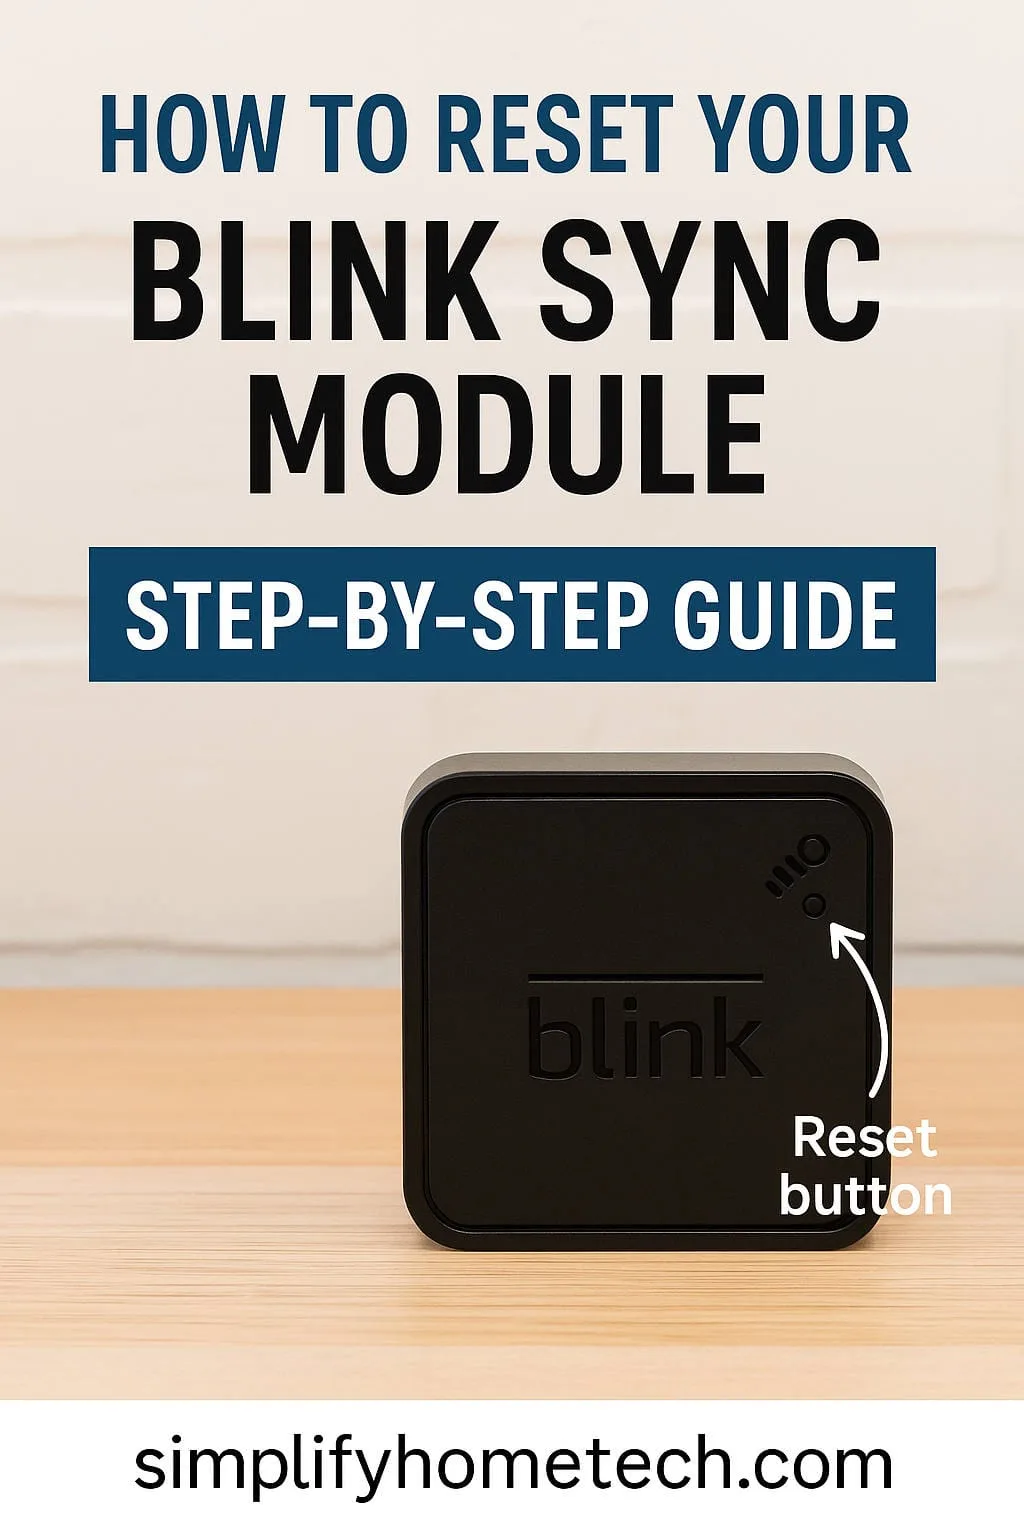
Image source: Web (Bing) / simplifyhometech.com (Web image (fair-use with source credit))
Sync Module Gen 1
The first generation Sync Module has a physical button on the side. Unplug the module from power. Press and hold that side button.
While holding it, plug the module back in. Keep holding for ten seconds. The LED blinks blue rapidly, then turns solid blue.
Release the button. The module resets to factory settings. All paired cameras must be re-synced afterward.
Sync Module Gen 2 (the current model)
The second generation Sync Module uses a recessed pinhole on the bottom. You need a paperclip. With the module powered on, stick the paperclip into the pinhole.
Press and hold for ten seconds. The front LED flashes rapidly. Release.
The module reboots and enters pairing mode. It wipes all camera associations.
When to Reset the Sync Module Instead of the Camera
| Problem | Fix |
|---|---|
| All cameras show offline simultaneously | Reset the Sync Module, not each camera individually |
| Sync Module LED blinking green continuously | The module has power but no internet connection; check router first, then try a module reset |
| New router installed or Wi-Fi network changed | Reset the Sync Module so it can scan for and connect to the new network |
| One camera offline but others work fine | Reset that single camera, not the module |
| Camera syncs but live view fails to load | Try a camera power cycle first; if it persists, a module reset may help |
What Happens to Your Clips After a Reset?
This question comes up constantly. The answer depends on the reset type and your storage setup.
A power cycle does not touch your clips at all. All recorded video stays in the cloud or on your local USB drive. The camera just needed a fresh start.
Nothing is lost.
A factory reset is different. It clears the camera's internal memory, but that only holds temporary operational data. Your saved clips in Blink's cloud storage remain untouched.
You can still view them in the app after re-syncing the camera. The clips are tied to your account, not to the individual camera hardware.
If you use a Sync Module Gen 2 with a USB drive for local storage, the factory reset also leaves those files alone. The USB drive is physically separate from the Sync Module's firmware memory. Your recorded events stay on the drive.
You just need to re-pair the camera to access live view and new recordings.
The one scenario where you lose access: factory resetting the Sync Module itself. That action wipes the module's configuration, which includes the link between your app account and the local storage. The USB drive's files remain intact on the drive itself, but the Sync Module no longer knows how to serve them.
You can regain access by reconnecting the Sync Module to your account and re-pairing all cameras. The old clips on the USB drive become visible again after the system re-indexes them.
The Most Common Reset Mistakes and How to Avoid Them
Our research across Blink community forums and support cases reveals a handful of recurring errors. Avoiding these saves you time and prevents unnecessary returns.
Mistake 1: Rushing the power cycle. A quick pull and reinsert of batteries or the USB cable often fails. The camera's capacitors hold enough residual charge to keep a glitch alive. Always wait a full ten seconds.
Count it out.
Mistake 2: Confusing the Sync Module reset with a camera reset. If all cameras are down, resetting one camera at a time is a waste of effort. Reset the Sync Module first. It fixes the root cause faster.
Mistake 3: Not removing the camera from your account before selling it. A factory reset clears Wi-Fi credentials from the camera, but it does not automatically unlink the device from your Blink account. The next owner will try to sync it and get an error. Always open the app, go to Settings, tap the camera, and select "Remove Device" or "Delete Camera" before handing it off.
Mistake 4: Using rechargeable batteries in XT or XT2 models. Blink's official specifications state that these cameras require non-rechargeable AA lithium batteries. Rechargeable AAs output a slightly lower voltage. The camera may flash a false low-battery warning or behave erratically after a reset.
Stick with Energizer Ultimate Lithium or the equivalent.
Mistake 5: Forgetting about the 2.4 GHz requirement. Blink cameras only support 2.4 GHz Wi-Fi networks. If your router broadcasts a combined 2.4 GHz and 5 GHz network under one SSID, the camera can struggle to connect after a reset. Split the bands into separate SSIDs in your router settings.
Connect the camera to the 2.4 GHz network only.
Mistake 6: Resetting a camera that is still linked to another account. If you bought a used camera, you must first ask the original owner to remove it from their Blink account. A factory reset alone will not transfer ownership. The camera will refuse to sync with your account until the previous owner releases it.
This is a common point of confusion with second-hand purchases.
Why Your Camera Won't Sync After the Reset (And What to Check)
You followed the reset steps perfectly. The LED flashed and turned solid blue. But the Blink app says "unable to add device." This happens more often than people expect.
Here is the troubleshooting order we recommend.
Check the QR code. Each Blink camera has a unique QR code on the back or inside the battery compartment. The app needs to scan this code during setup. If the code is scratched, faded, or missing, grab the serial number printed nearby and enter it manually in the app.
Check the Sync Module status. Open the app and look at the Sync Module tile. Is it showing "online"? If the module is offline or blinking green, the camera cannot sync.
Fix the Sync Module first. If you need help with a complete factory-level reset on other devices, the process is similar to what you would use for resetting an Xbox One or other smart home gear.
Check the distance. Blink cameras use a proprietary radio frequency to communicate with the Sync Module, not your home Wi-Fi directly. The range is roughly 100 feet indoors, but walls, metal appliances, and large mirrors reduce that. Bring the camera within 10 to 15 feet of the Sync Module during setup.
Move it to its permanent location only after a successful sync.
Check for interference. Other 2.4 GHz devices can cause interference. Baby monitors, cordless phones, and microwave ovens all operate in the same frequency band. Temporarily turn off nearby electronics during the pairing process.
Check the app permissions. The Blink app needs location permission enabled (even if you never use geofencing) to scan for Wi-Fi networks on Android. On iOS, it needs local network access. Denying these permissions blocks the sync process silently.
Go to your phone's settings and verify Blink has the required permissions.
Check the Sync Module firmware. Outdated firmware can prevent new camera pairings. In the app, go to Settings, tap Sync Module, and look for a firmware update option. Run any available updates before attempting to add a camera.
How to Remove a Camera From Your Account Before Selling or Giving It Away
This step matters more than the reset itself. A factory reset wipes the camera's data, but it does not automatically remove the device from your Blink account. The camera stays registered to your account indefinitely unless you manually delete it.
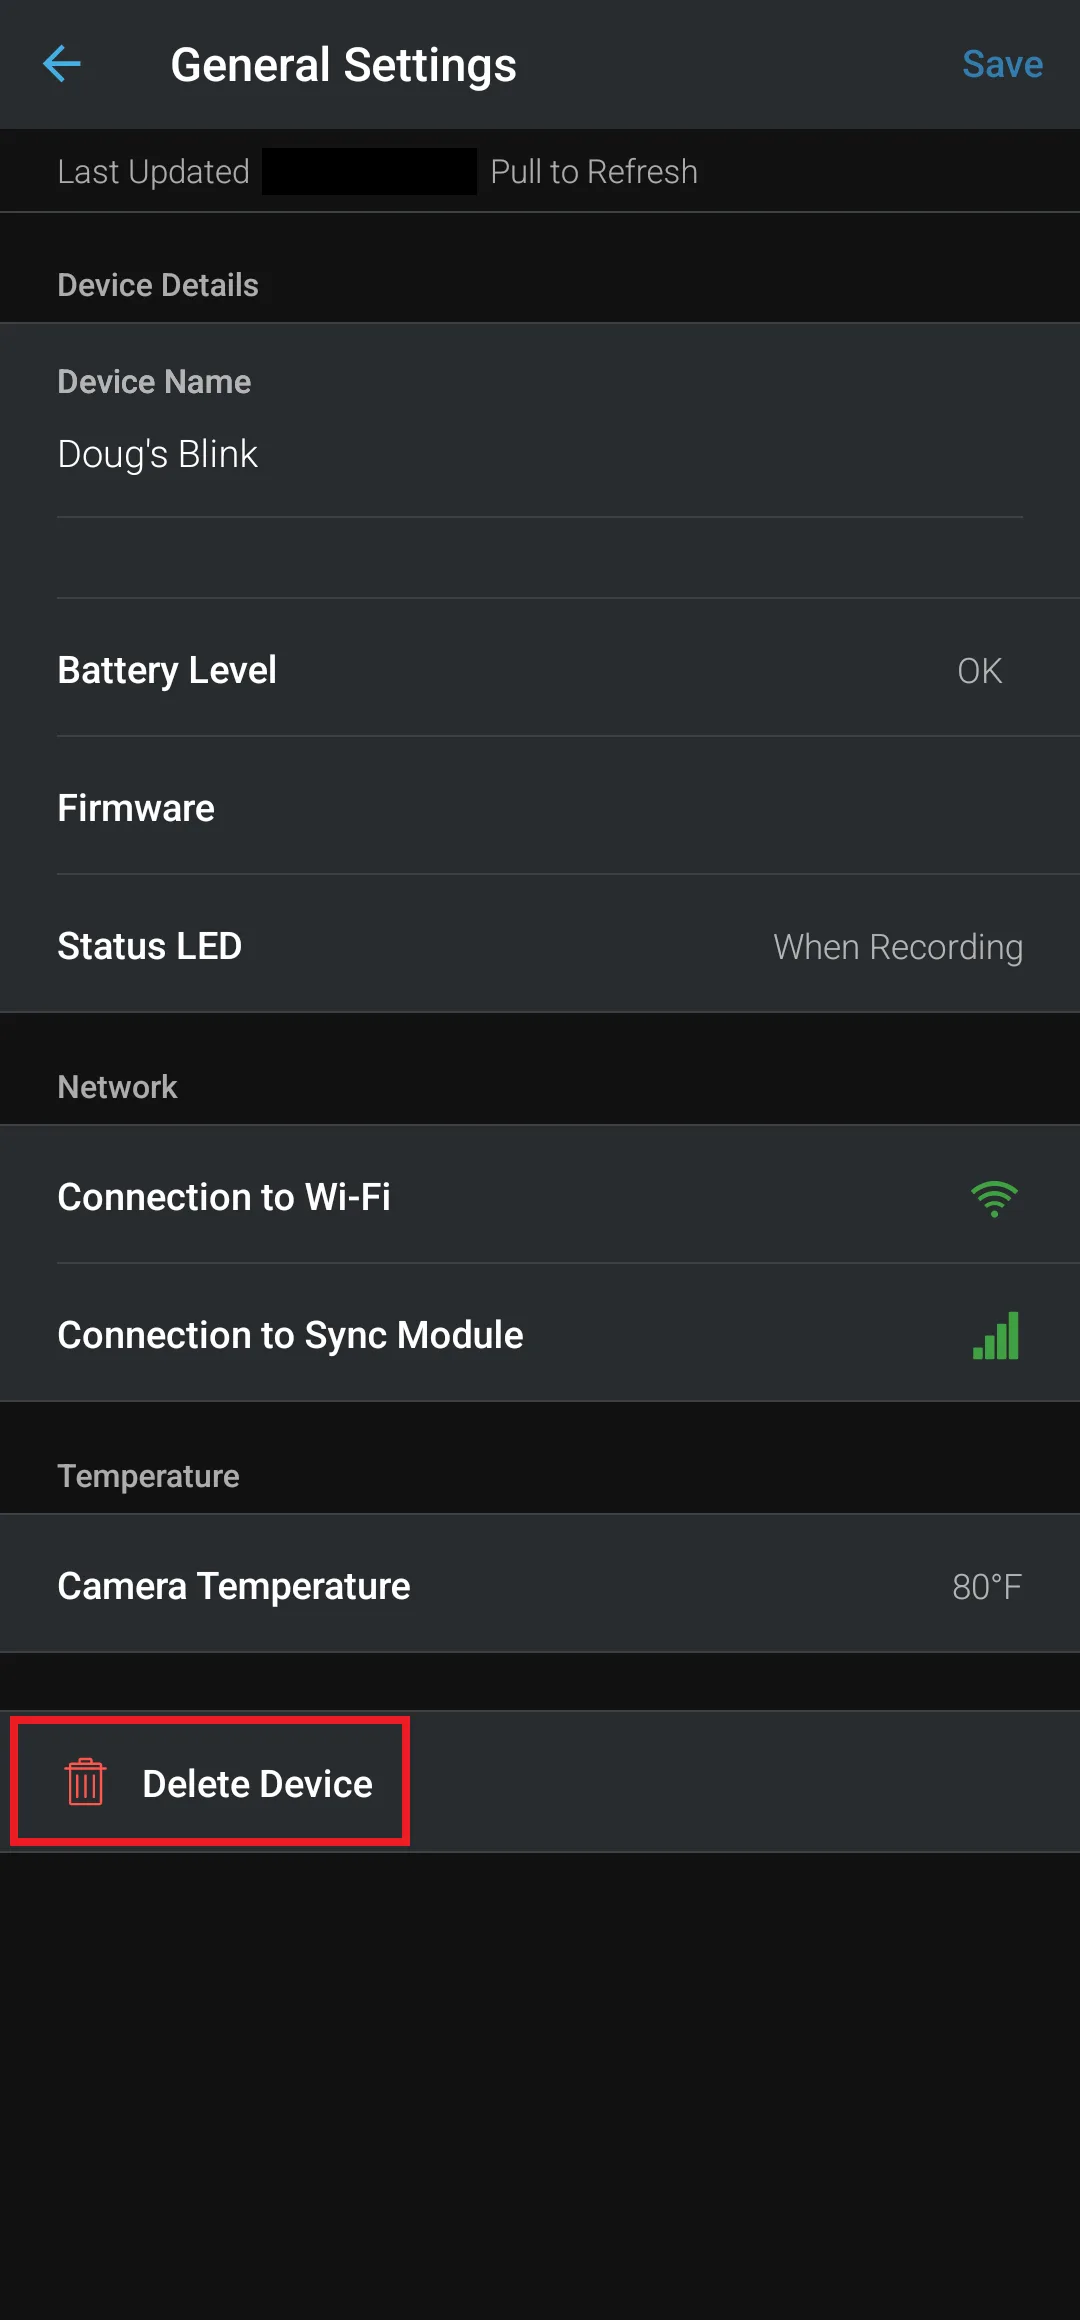
Image source: Web (Bing) / blinqblinq.com (Web image (fair-use with source credit))
Here is the correct process.
Open the Blink app. Tap the three-line menu icon in the top left corner. Select "Settings." Tap the camera you want to remove.
Scroll down to the bottom of the camera settings page. Tap "Delete Camera" or "Remove Device." Confirm the deletion when prompted.
This action does three things. It unlinks the camera from your Sync Module. It removes the camera from your account's device list.
And it frees the camera to be registered to a new account.
After deleting the camera from your account, perform the factory reset on the physical device. This ensures all local data and Wi-Fi credentials are gone. The new owner now has a clean camera that will pair with their own account on first boot.
Never skip the account removal step. We have seen dozens of forum posts from people who bought used Blink cameras and cannot get them to work because the original owner never released them. Blink's support team can help transfer ownership, but the process requires proof of purchase and several business days.
Do the seller a favor and handle it upfront.
Blink Camera Won't Connect to Wi-Fi After Reset? Try This
A factory reset clears the camera's Wi-Fi credentials. That is by design. After the reset, the camera expects to be guided through a fresh Wi-Fi connection via the app.
But sometimes that process fails even when the camera itself works fine.
Reboot your router. A simple router restart clears the DHCP lease table and can resolve IP address conflicts. Unplug your router for thirty seconds. Plug it back in.
Wait for the internet connection to restore fully, usually two to three minutes. Then try the camera setup again.
Forget the network in the app. In the Blink app, go to Settings, tap Wi-Fi Networks, and select "Forget Network." This clears any cached network data the app may be holding onto. Then proceed with the normal add-device flow.
Use a different phone or tablet. Sometimes the camera syncs fine but the phone's network stack interferes. Try setting up the camera with a different device. If it works, the issue is your primary phone's configuration, not the camera.
Disable mobile data. On both Android and iOS, having mobile data active during Wi-Fi setup can confuse the app. The app sees two active internet connections and may try to route the sync traffic over cellular data, which the camera cannot use. Toggle mobile data off in your phone's quick settings.
Leave Wi-Fi on. Run the setup again.
Check for MAC address filtering. Some routers have MAC address filtering enabled. This blocks devices not on an approved list. Your Blink camera's MAC address is printed on a sticker on the camera body or inside the battery compartment.
Add it to your router's allowed devices list.
Try a static IP. If your router is having trouble assigning an IP address to the camera, the app may time out during setup. Some advanced users set a static IP for the camera via the router's DHCP reservation settings. This is not necessary for most people, but it solves stubborn cases.
If none of these steps work, the camera may have a hardware fault. Contact Blink support. They can run diagnostic checks on the device remotely and determine if it needs replacement.
When All Else Fails: Blink Support and Community Fixes for Stubborn Cameras
Some Blink cameras are more stubborn than others. After trying every reset method, troubleshooting step, and network change, a small percentage of devices still refuse to cooperate. That is when you escalate.
Blink Support. The official support route is straightforward. Open the Blink app. Go to Settings.
Tap Help. Browse the FAQ articles first; many issues have documented fixes. If nothing matches your problem, use the "Contact Us" button to open a ticket.
Support response times vary from a few hours to two business days. Include your camera model, Sync Module generation, and a description of the LED behavior to speed things up.
The community forums. Blink's official community forum is searchable and active. Many edge cases have been discussed there, including rare firmware bugs and compatibility issues with specific router models. Search for your camera model plus "reset" or "offline" before posting a new question.
Chances are someone else already solved it.
Camera replacement under warranty. Blink cameras come with a one-year limited warranty. If your camera is less than twelve months old and hardware failure is suspected, Blink typically replaces it free of charge. You need the original purchase receipt.
The replacement process involves shipping the defective unit back first, then receiving a new one. Turnaround time is roughly one to two weeks.
Sync Module replacement. The same one-year warranty applies to Sync Modules. If your Sync Module is unresponsive after multiple reset attempts and power cycles, submit a support ticket. A failing Sync Module often shows a blinking blue LED that never stabilizes or a solid red LED that indicates a hardware fault.
DIY repairs (not recommended). Some users attempt to open the camera casing and reseat internal ribbon cables or replace the battery terminal contacts. Given Blink's sealed design, this almost always voids the warranty and often damages the water-resistant seals. We do not recommend it.
If the camera is out of warranty and you are comfortable with soldering, there are third-party repair guides available, but the success rate is low.
Final Decision Guide: Choose Your Reset Path Based on Your Situation
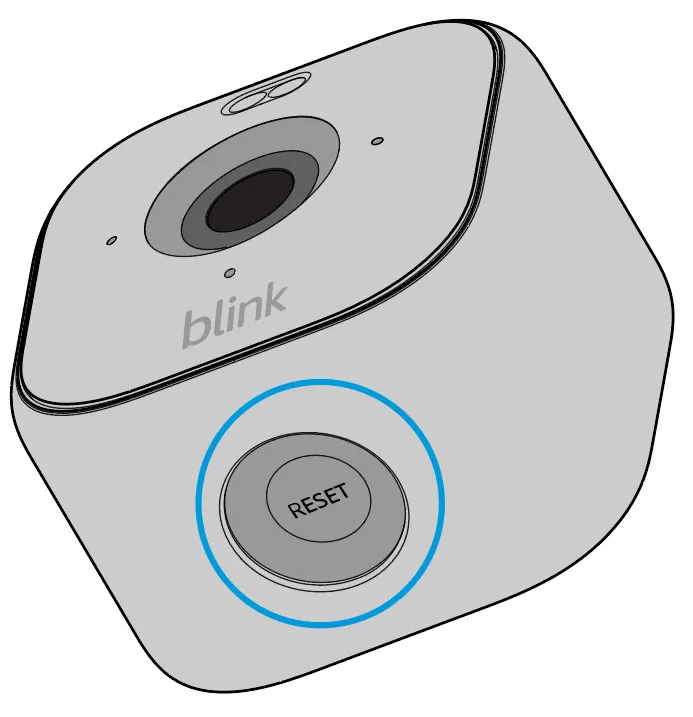
Image source: Web (Bing) / trailcamvalley.com (Web image (fair-use with source credit))
Here is a quick reference for exactly which reset to use.
| Your Situation | Action |
|---|---|
| Camera offline, no changes to network | Power cycle the camera |
| Camera offline after changing Wi-Fi password | Update Wi-Fi in app, power cycle only if needed |
| Camera stuck on flashing red LED | Power cycle the camera |
| Camera won't sync after initial setup attempt | Factory reset the camera, then re-pair |
| Selling or giving away the camera | Remove from account in app, then factory reset |
| Bought a used camera | Factory reset, then attempt setup (if it fails, ask seller to release it) |
| All cameras offline simultaneously | Reset the Sync Module, check router |
| Sync Module blinking green continuously | Check internet connection, then factory reset Sync Module |
| One camera works, another does not | Factory reset the non-working camera |
| Camera connected but live view fails | Power cycle, then check Wi-Fi signal strength at camera location |
Frequently Asked Questions
How long should I hold the reset button on a Blink camera?
Hold the reset button for ten to fifteen seconds. Release when the LED flashes red then blue. Holding it too briefly (under five seconds) often triggers a reboot instead of a full factory reset.
Does resetting a Blink camera delete my recordings?
No. A factory reset clears the camera's local memory and Wi-Fi credentials, but your recordings stay in Blink's cloud storage. You can view them after re-syncing the camera to your account.
What does it mean when my Blink camera blinks red?
A blinking red LED usually means the camera has lost connection to the Sync Module or Wi-Fi network. Try a power cycle first. If the red blinking continues, a factory reset may be necessary.
Can I reset a Blink camera without the app?
You can perform a physical factory reset without the app by pressing the reset button with a paperclip. However, you need the app to complete the setup process afterward and to re-connect the camera to your network.
Why is my Blink camera not syncing after a factory reset?
Common causes include a Sync Module that is offline, the camera being still linked to a previous owner's account, or interference from other 2.4 GHz devices. Check each of these in the order listed in the troubleshooting section above.
How do I reset a Blink Sync Module?
For Gen 1, unplug the module, hold the side button, plug it back in while holding, and release after ten seconds. For Gen 2, insert a paperclip into the bottom pinhole and hold for ten seconds while the module is powered on.