Will You Lose Everything If You Reset Your iPhone?
Your iPhone is basically your whole life at this point. Photos of your dog, that three year old text chain with your best friend, your banking apps, your two factor codes, your notes app full of half baked ideas. So when the question "if i reset my iphone will i lose everything" pops into your head, it hits different.
It is not just a tech question. It is a gut check.
The short answer is: it depends entirely on which reset you actually do and whether you have a backup sitting somewhere. Apple's documentation confirms there are three distinct types of resets on an iPhone running iOS 17 or 18. They behave very differently.
One wipes your data completely. Another just resets your preferences. And a third sits somewhere in between.
The difference between losing everything and keeping everything comes down to about thirty seconds of menu choices. Let us walk through exactly which is which and what you need to check before you tap anything.
Quick Answer
No, you will not lose everything if you have a current backup. The right reset with a backup restores almost all your data. Without a backup, you lose everything stored locally.
The key is knowing which reset you are doing. Erase All Content and Settings deletes everything. Reset All Settings keeps your data.
Always back up first. Check your iCloud or iTunes backup before tapping anything.
What Happens When You Reset Your iPhone? (The Real Answer)
Here is the most important thing to understand. "Reset" on an iPhone is not one single action. It is a menu with multiple options.
Each one does something completely different to your data. Apple grouped them under one heading in Settings, which is why people get confused and panic.
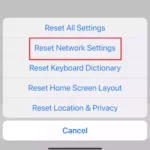
When you go to Settings > General > Transfer or Reset iPhone, you see several options. The two most common ones people mix up are:
- Reset All Settings, This wipes your preferences but keeps your photos, messages, apps, and media.
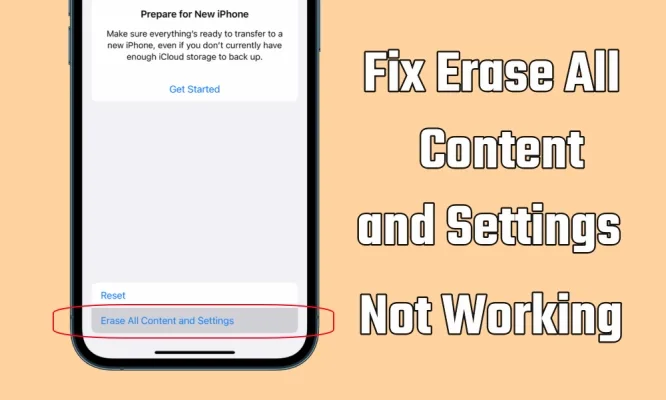
- Erase All Content and Settings, This wipes absolutely everything and returns the phone to factory condition.
That second one is the scary one. But even then, losing everything depends entirely on whether you have a backup. If you have a recent iCloud backup or an iTunes backup on your computer, you can restore almost everything back onto the phone.
Image source: Web (Bing) / magfone.com (Web image (fair-use with source credit))
There is also a third option that lives outside this menu. You can erase your iPhone remotely through Find My iPhone on another device or through a DFU mode restore using a computer. Both of those are full wipes.
Neither of them asks nicely if you are sure.
The bottom line is this. If you are asking whether you will lose everything, you are probably looking at Erase All Content and Settings. The honest answer is: you will lose everything that is currently on the phone.
But if you backed up first, you can bring most of it back.
The First Thing You Need to Understand: There's More Than One "Reset"
Let us pull that menu apart so you know exactly what you are looking at next time you open it. Apple gives you five options under the Transfer or Reset menu as of iOS 18.
Each option targets different parts of the phone. Choosing the wrong one because you were in a hurry is the most common mistake people make.
| Reset Option | What It Affects | What It Keeps |
|---|---|---|
| Reset All Settings | Wi-Fi passwords, wallpaper, accessibility settings, notifications, keyboard dictionary | All photos, messages, apps, contacts, music, documents |
| Erase All Content and Settings | Everything on the phone | Nothing. Returns to factory condition |
| Reset Network Settings | Wi-Fi networks and passwords, Bluetooth connections, VPN configs, cellular settings | All photos, messages, apps, contacts, media |
| Reset Keyboard Dictionary | Custom words you have taught the keyboard | Everything else stays |
| Reset Location & Privacy | App permission settings and location preferences | Everything else stays |
The first option, Reset All Settings, is the one that people often confuse with a full factory reset. It looks scary because it requires your passcode and confirms that it will reset your settings. But it does not touch your personal data.
Think of it as a preferences reset. Your phone still has all your photos, messages, app data, and accounts. You just need to reconnect to Wi-Fi and rearrange your home screen layout.
The second option, Erase All Content and Settings, is the full nuclear option. This is what you do when you sell your phone, give it away, or when a serious software bug makes the phone unusable and you have already tried everything else. This deletes every photo, message, app, saved password, and note.
The phone goes back to the exact state it was in when you first pulled it out of the box.
If you are asking whether you will lose everything, you are almost certainly thinking about this second option. And the answer is yes, you will. But there is a massive difference between losing your data and not having it on your phone right now.
That difference is a backup.
Decision Tree: Which Reset Are You Actually Doing?
Let us take the guesswork out of it. Use the questions below to figure out exactly which reset matches your situation. Read through each branch and find the one that fits.
Branch 1: Erase All Content and Settings (Full Wipe)
You should choose this if any of the following are true.
- You are selling or trading in your iPhone.
- You are giving the phone to a family member or friend.
- You have a persistent software problem that other fixes did not solve.
- You forgot your passcode and need to erase the phone to regain access (this requires a computer and recovery mode).
- You want a completely fresh start with no leftover clutter.
If this is your branch, you will lose everything on the phone. But you can restore most of it from a backup after the wipe.
Branch 2: Reset All Settings (Network, Keyboard, Dictionary, Location)
You should choose this if any of the following are true.
- Your Wi-Fi or Bluetooth is acting up and you want to clear all network configs.
- Your iPhone is behaving strangely after an iOS update (glitchy animations, settings not sticking).
- You want to reset your home screen layout to default without losing data.
- Your keyboard predictions are weird and you want to clear the learned dictionary.
- An app keeps asking for location permission even though you already set it.
If this is your branch, you will not lose any personal data. No photos, no messages, no apps, no media. You just lose your preferences.
You will need to reconnect to Wi-Fi and rearrange your home screen.
Branch 3: Erase via Find My iPhone or DFU Mode
You should choose this if any of the following are true.
- You lost your iPhone and want to wipe it remotely to protect your data.
- Your iPhone is stuck in a boot loop or recovery mode and will not start normally.
- You tried Erase All Content and Settings through the Settings app and it failed or got stuck.
- You need the deepest possible wipe (DFU mode) for a severe software issue.
If this is your branch, the phone gets wiped just like Branch 1. The difference is that you cannot restore from a backup on a lost phone. For DFU mode, you can restore from a backup after the process completes.
But DFU mode wipes even the firmware settings. Use it only when nothing else works.
Do You Have a Backup? Here's How to Check Right Now
Before you even think about tapping that reset button, you need to know whether you have a backup. This is the single most important step. It takes about thirty seconds to check.
iCloud Backup Status Check
Open Settings on your iPhone. Tap your name at the top. Then tap iCloud.
Scroll down and tap iCloud Backup.
You will see two important pieces of information.
- Back Up This iPhone toggle, Is it on or off? If it is off, you have no automatic iCloud backups.
- Last Successful Backup, Below the toggle, it shows a date and time. If it says Never or the date is months old, your backup is not current.
If the toggle is on and the date is recent, you have a backup. You can tap Back Up Now to create a fresh one before you reset. If the toggle is off, you have never had an iCloud backup.
You need to either turn it on and create one, or use a computer instead.
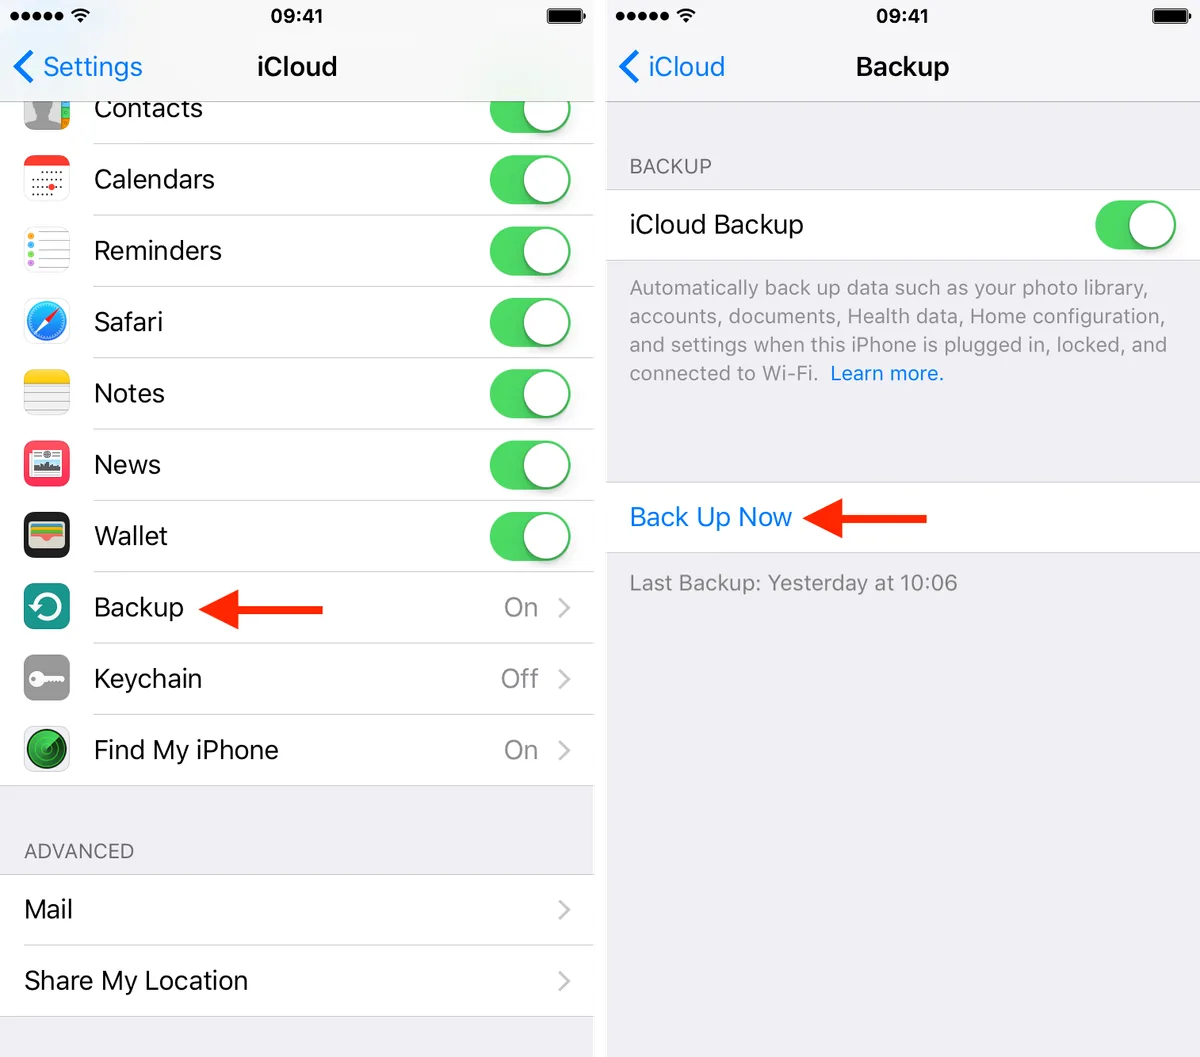
Image source: Web (Bing) / idownloadblog.com (Web image (fair-use with source credit))
One thing to watch out for. iCloud only gives you 5GB of free storage. That is enough for a very small amount of data. If you have more than 5GB of photos, messages, and app data, your backup will fail until you free up space or buy more storage.
Check your storage by going to Settings > Your Name > iCloud > Manage Account Storage. If it shows Backups in red or over capacity, that is your problem.
iTunes/Finder Backup Status Check
If you have a computer, you might have an iTunes or Finder backup. This is actually more reliable in some ways because it is not limited by iCloud's 5GB cap.
Connect your iPhone to your computer using a USB cable. Open Finder on a Mac running macOS Catalina or later. Open iTunes on a Windows PC or an older Mac.
Click on your iPhone icon when it appears.
Under the General or Summary tab, look for the Manually Back Up and Restore section. You will see the date and time of the last backup to this computer. If there is a backup listed, click Back Up Now to create a fresh one.
Pay attention to one critical detail. There is a checkbox that says Encrypt local backup. If you want to save your Health data, saved passwords, and Wi-Fi settings, you need to check this box and set a password.
An unencrypted backup saves most of your data but skips these sensitive categories. Apple's support documentation confirms that Health data and keychain passwords are only included in encrypted backups.
If you have never connected your iPhone to this computer before, there will be no backup. That is fine. You can create one now.
It will take anywhere from ten minutes to an hour depending on how much data you have.
The safest scenario is having both an iCloud backup and an iTunes backup. That way, if one fails, you have the other as a fallback. If you have neither, stop right here.
Do not reset until you create one.
Step-by-Step: How to Back Up Before You Reset
Alright, you have checked your backup status. If you found a recent backup, great. If you did not, now is the time to create one.
Here is exactly how to do it with both methods.
iCloud Method (Wireless)
This is the easiest option. You do not need a computer or a cable. You just need Wi-Fi and enough iCloud storage.
- Connect your iPhone to Wi-Fi. This will not work over cellular data.
- Plug your iPhone into power. Apple requires this for iCloud backups to start.
- Open Settings. Tap your name at the top.
- Tap iCloud. Then tap iCloud Backup.
- Make sure the Back Up This iPhone toggle is switched on.
- Tap Back Up Now.
You will see a progress bar under the button. The time depends on how much data you have and your internet speed. A phone with 64GB of storage and a decent Wi-Fi connection usually finishes in 15 to 30 minutes.
A phone with 256GB of photos and a slow connection can take several hours.
Do not interrupt the backup once it starts. Do not leave Wi-Fi range. Do not turn off your phone.
You will know it is done when the Last Successful Backup timestamp updates to the current date and time.
One thing to keep in mind. iCloud backups include your app data, device settings, messages, and photos if you have iCloud Photos turned off. But if you have iCloud Photos turned on, your photos are already synced to the cloud separately. That means your backup will be smaller.
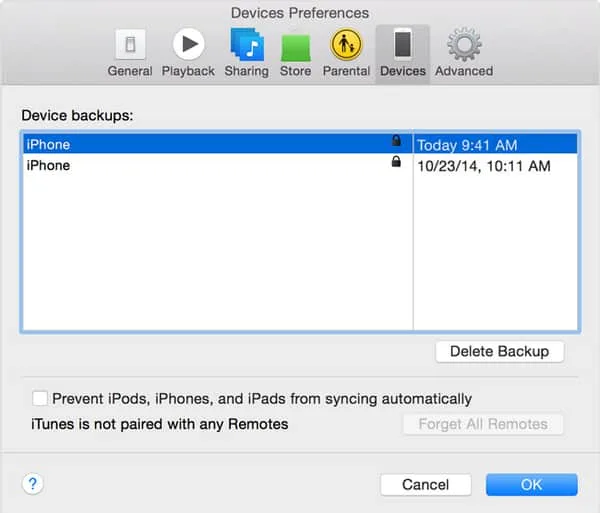
Image source: Web (Bing) / anymp4.com (Web image (fair-use with source credit))
iTunes/Finder Method (Computer, Encrypted Recommended)
This method is more reliable. It is not limited by iCloud storage. It is faster over USB.
And if you check the encryption box, it saves everything including your Health data and saved passwords.
- Connect your iPhone to your computer using a USB cable.
- Open Finder on a Mac running macOS Catalina or later. Open iTunes on Windows or an older Mac.
- Click on your iPhone icon when it appears in the sidebar or top left corner.
- Under the General or Summary tab, find the Backups section.
- Select This computer as the backup destination.
- Check the box that says Encrypt local backup.
- Create a password when prompted. Write this down somewhere safe. You cannot restore from an encrypted backup without this password.
- Click Back Up Now.
The backup will start immediately. A full backup of a 128GB iPhone over USB typically takes 10 to 40 minutes. Over Wi-Fi sync, it takes longer but works if you prefer wireless.
Here is why the encryption checkbox matters. An unencrypted backup saves your photos, messages, contacts, calendars, and most app data. But it skips your Health data, saved Wi-Fi passwords, and keychain (which includes website passwords and credit card info).
An encrypted backup saves all of that. Apple's support documentation confirms that Health data and keychain items are only included in encrypted backups.
If you skip encryption, you can still restore most of your stuff. But you will lose your Health data history, and you will have to re-enter every Wi-Fi password and website login manually. Just check the box.
What You'll Actually Lose (The Honest List)
Let us get specific. People want to know exactly what disappears and what comes back. Here is the breakdown by category.
Data That Restores Perfectly
If you have a backup, whether iCloud or iTunes, these items restore completely.
- Photos and videos, As long as they were on the phone at backup time. If you use iCloud Photos, they are already synced to the cloud and will download again regardless of backup status.
- Messages and iMessage history, Every text, photo, and attachment comes back.
- Contacts, Synced through iCloud or your email account. They come back immediately.
- Calendars and reminders, Same as contacts. They sync through your accounts.
- App data, Most apps save their data to the backup. Game progress, note taking apps, messaging apps like WhatsApp and Telegram (if they use iCloud backup), and productivity tools all restore.
- Home screen layout, Your app arrangement and folders come back exactly as they were.
- Wallpaper and accessibility settings, These are part of the settings backup.
- Mail accounts, Your configured email accounts restore automatically.
- Health data, Only if you had an encrypted iTunes/Finder backup. iCloud backups also include Health data if you have iCloud Backup enabled.
- Keychain passwords, Again, only with encrypted backup.
For the most part, if it was on your phone and you backed it up, it comes back.
Data That Won't Come Back (Even With a Backup)
Some things do not survive the reset and restore process, even with a perfect backup.
- Face ID or Touch ID configurations, These are stored in the Secure Enclave on the phone's hardware. They do not get backed up to iCloud or iTunes for security reasons. You will need to rescan your face or fingerprints after restoring.
- Apple Pay cards, Your credit and debit cards in Apple Wallet are removed during a reset. You will need to re-add them from your bank or card issuer.
- Some two factor authentication codes, If you use an authenticator app that is not tied to iCloud Keychain, those codes are stored locally on the phone. When you restore, the app comes back but the codes may be gone. Authy and Google Authenticator have their own cloud backup options, but not everyone has them turned on.
- eSIM profiles, This catches people off guard. A physical SIM card stays in the phone and works after a reset. But an eSIM is a digital profile stored on the phone. When you erase all content and settings, that eSIM profile gets deleted. Some carriers allow you to re-download it easily. Others require a store visit or a phone call.
- App specific data not backed up, Some apps exclude their data from iCloud backup for privacy reasons. Banking apps, some health tracking apps, and certain secure messaging apps fall into this category.
- Apple Watch pairings, If you have an Apple Watch paired to your iPhone, the reset unpairs it. You will need to pair it again after restoring. Your watch data is backed up as part of the iPhone backup. But the pairing itself is gone.
The eSIM Trap Nobody Warns You About
This deserves its own spotlight because it causes so much frustration. In the United States, most new iPhones sold after the iPhone 14 no longer have a physical SIM card tray. They rely entirely on eSIM.
If you reset one of these phones, your cellular service is gone until you reactivate the eSIM.
Here is how it breaks down by carrier.
- T-Mobile, You can re-download your eSIM through the carrier's app or by logging into your account online. Usually takes a few minutes.
- Verizon, You can reactivate through the My Verizon app or website. Some users report needing to call customer service.
- AT&T, Similar to Verizon. You can usually do it through the myAT&T app. Occasionally requires a call.
- International carriers, This varies wildly. Some let you re-download instantly. Others require a physical store visit with your passport.
If you have an eSIM and you are planning to reset, do this before you wipe the phone. Go to Settings > Cellular. Tap your cellular plan.
Note the carrier and plan details somewhere safe. Better yet, contact your carrier ahead of time and confirm their eSIM reactivation process.
Some MVNOs (mobile virtual network operators) like Mint Mobile, Visible, and Google Fi have different processes. Visible lets you re-download the eSIM through their app. Mint Mobile requires you to contact support to get a new QR code.
If you are traveling abroad and using a local eSIM for data, save the QR code or activation link in a secure note or email. Once you reset, that eSIM is gone and you may not be able to get it back without buying a new plan.
The Activation Lock Gotcha (Don't Skip This)
Here is the part that turns a simple reset into a bricked phone nightmare. Activation Lock.
Activation Lock is Apple's anti-theft feature. When you have Find My iPhone turned on, your iPhone is tied to your Apple ID. If you erase the phone without signing out of Find My first, the phone will ask for your Apple ID password during the setup process after the reset.
If you do not know that password, or if you reset the phone after selling it without removing your account, the phone becomes unusable.
Image source: Web (Bing) / support.apple.com (Web image (fair-use with source credit))
This is not a bug. It is a feature designed to make stolen iPhones worthless. But it also catches honest people who forget to disconnect their account before a reset.
Here is how to avoid it. Before you do any erase, go to Settings > Your Name > Find My. Tap Find My iPhone.
Toggle it off. You will need to enter your Apple ID password to confirm. This disables Activation Lock and allows the next person to set up the phone as their own.
If you are keeping the phone and just resetting it for a fresh start, you do not need to turn off Find My. The Activation Lock will recognize your Apple ID when you sign back in during setup. But if you are selling, trading, or giving the phone away, turning off Find My is mandatory.
What happens if you already erased the phone and now it is asking for an Apple ID that you do not remember? Take your original receipt or invoice to an Apple Store or contact Apple Support online. They can unlock the phone if you can prove you bought it.
Without that proof, the phone is a paperweight.
This is also a common problem with used iPhones. If you buy a used iPhone and the seller did not remove their Apple ID, you cannot use the phone. Always check that Find My is off before you buy a used iPhone.
Go to Settings > Your Name on the phone. If it shows someone else's name, do not buy it.
How Long Does All of This Take? (Real Timelines)
Time is probably the thing people underestimate the most. A full iPhone reset and restore is not a five minute job. Here are realistic timelines.
Backup time (before the reset)
- iCloud backup over Wi-Fi: 15 minutes to 3 hours. A 64GB phone with mostly messages and a few apps finishes in about 20 minutes on a good connection. A 256GB phone packed with photos and videos can take over two hours.
- iTunes/Finder backup over USB: 10 to 45 minutes. USB is faster because it is a direct wired connection. Encryption adds about 5 to 10 minutes.
- iTunes/Finder backup over Wi-Fi: 30 minutes to 2 hours.
The actual reset
- Erase All Content and Settings: 2 to 10 minutes. The phone destroys the encryption keys that scramble your data. Your data is still technically on the flash storage, but it is unreadable without those keys.
- DFU mode restore through a computer: 15 to 30 minutes. This downloads the full iOS firmware and writes it to the phone.
Restore time (after the reset)
- iCloud restore: 30 minutes to 6 hours. This is the slowest part. The phone has to download every app, every photo, and every message over Wi-Fi. A full restore of a 128GB phone on a standard cable internet connection typically takes 2 to 4 hours.
- iTunes/Finder restore from computer: 20 minutes to 2 hours. Much faster because the data comes over USB.
- Quick Start wireless transfer: 30 minutes to 2 hours. This transfers data directly between two iPhones over peer-to-peer Wi-Fi.
| Scenario | Backup | Reset | Restore | Total |
|---|---|---|---|---|
| iCloud backup + iCloud restore | 15 min – 3 hrs | 2–10 min | 30 min – 6 hrs | 1 – 9+ hrs |
| iTunes backup + iTunes restore | 10–45 min | 2–10 min | 20 min – 2 hrs | 32 min – 3 hrs |
| No backup + fresh start | N/A | 2–10 min | N/A | 2–10 min |
| DFU mode + fresh start | N/A | 15–30 min | N/A | 15–30 min |
The big takeaway: an iCloud restore takes the longest. If you are on a tight schedule, use a computer. It is dramatically faster.
And if you have a slow internet connection, an iCloud restore can stretch into an overnight process.
One more thing. iOS 18 introduced a feature that lets you start using your phone while the restore continues in the background. You can make calls and send texts while photos and large files download.
Common Mistakes People Make Right Before Resetting
After looking at hundreds of forum posts and Apple Support threads, certain mistakes come up over and over. Here are the ones that cause the most pain.
Mistake 1: Assuming iCloud Photos is a backup
This is the number one misconception. iCloud Photos is a sync service, not a backup. If you delete a photo from your phone, iCloud Photos deletes it from the cloud too. If you reset your phone without a proper backup and rely on iCloud Photos, you might find your photo library empty or incomplete after the restore.
The fix is simple. Before resetting, make sure you have a proper iCloud Backup or iTunes backup that includes your photos. You can also export your full photo library to a computer using the Image Capture app on Mac or the Photos app on Windows.
Mistake 2: Forgetting to sign out of iCloud before selling
If you sell or trade in your iPhone and you do not sign out of iCloud and turn off Find My, the buyer cannot use the phone. They will call you asking for your Apple ID password. If you do not remember it, they are stuck.
Before you erase for a sale, go to Settings > Your Name > Find My. Turn off Find My iPhone. Then go back to Settings > Your Name and scroll to the bottom.
Tap Sign Out. This removes your account entirely. Then do the erase.
Mistake 3: Not writing down the encrypted backup password
You set a password for your encrypted iTunes backup. Now you have forgotten it. Apple cannot recover encrypted backup passwords.
There is no reset process, no email recovery, no security questions. If you lose that password, the backup is permanently inaccessible.
Write the password down on paper and put it somewhere safe. Do not store it only on your phone, because that is the device you are resetting. Put it in a password manager that syncs to a computer.
But write it on paper too.
Mistake 4: Assuming all app data comes back
Some apps do not participate in iCloud backup at all. Banking apps, authenticator apps, and certain secure messaging apps often exclude their data for privacy reasons. Signal requires you to manually create a chat backup within the app.
WhatsApp backs up to iCloud separately from the system backup.
Check each critical app before resetting. Open the app, go to its settings, and look for a backup or export option. Do this for your banking apps, authenticator apps, messaging apps, and any health tracking apps you care about.
Mistake 5: Resetting on low battery
An erase or restore process interrupted by a dead battery can leave the phone in an inconsistent state. In the worst case, the phone enters recovery mode and requires a computer to fix. Always plug your iPhone into power before starting a reset or restore.
Mistake 6: Resetting without checking carrier eSIM reactivation
If your phone uses eSIM only, confirm with your carrier exactly how to get your service back before you wipe the phone. Some carriers make you visit a physical store. Others require a phone call.
Do not assume it will just work.
Mistake 7: Not backing up the Apple Watch
Your Apple Watch is paired to your iPhone. When you reset the iPhone, the watch gets unpaired. The watch data is backed up as part of the iPhone backup.
But if you set up the iPhone as new without restoring from a backup, your Apple Watch data is gone.
After restoring your iPhone, open the Watch app and follow the prompts. But if you set up the iPhone as new, the Watch app will not let you pair without erasing the watch first.
The "I Already Reset Without a Backup" Recovery Guide
So you already did it. You tapped Erase All Content and Settings without backing up first. The phone is now sitting on the Hello screen asking you to set it up.
Let us talk about what you can actually recover.
Photos and videos
If you had iCloud Photos turned on before the reset, your photos are safe. They are stored in iCloud independently of the device backup. Sign in with your Apple ID during setup, turn on iCloud Photos, and they will download.
This can take a while, but they come back.
If you did not have iCloud Photos turned on, your photos are gone. There is no way to recover them from the phone itself because the encryption keys were destroyed during the erase.
Contacts, calendars, and mail
These are stored on your email provider's servers, not on the phone. Gmail, Outlook, Yahoo, and iCloud all keep your contacts synced. Sign in to your accounts during setup, and they reappear within minutes.
Messages and iMessage history
If you had iCloud Messages turned on, your messages are stored in iCloud and will download after you sign in. Go to Settings > Your Name > iCloud and make sure Messages is toggled on after setup.
If you did not have iCloud Messages turned on, your message history is gone. Every text, every photo sent in a message, every link. Deleted permanently during the erase.
App data
This is mostly gone. When you download apps from the App Store after a fresh setup, they install as brand new. No login history, no saved game progress, no chat history.
Some apps can recover data if they have their own cloud sync. Google apps sync independently. Netflix and Spotify store your data on their servers.
But most apps lose their local data permanently.
Health data
Gone unless you had iCloud Health sync turned on. Apple Health data can sync to iCloud separately from the device backup. Go to Settings > Your Name > iCloud > Show All > Health after setup.
If it is on, your health data will download. If it was off, it is gone.
Saved passwords and Wi-Fi networks
Gone. iCloud Keychain can save your passwords if you had it turned on. After setup, go to Settings > Your Name > iCloud > Passwords & Keychain and toggle it on. Your passwords will download from Apple's servers.
If you did not use iCloud Keychain, every saved password is lost.
Third party app backups
Some apps maintain their own cloud backups that do not depend on the iPhone backup. Here are the most common ones.
- WhatsApp: If you had WhatsApp backup to iCloud turned on, your chat history will restore when you reinstall WhatsApp and verify your number. This is a separate setting in WhatsApp itself.
- Signal: You need a manual chat backup file stored outside the phone. Without it, your Signal messages are gone.
- Telegram: Your messages are stored on Telegram's servers. They sync automatically when you log in.
- Authenticator apps: Google Authenticator and Authy can sync to the cloud if you enabled that option. Microsoft Authenticator syncs to your Microsoft account. If you did not enable cloud sync, every two factor code is gone.
The honest bottom line
If you reset without a backup and you did not use any of Apple's cloud sync features, you lose everything locally stored. Photos, messages, notes, app data, health data. All gone.
The only things that survive are data stored on remote servers: email, contacts, calendars, and anything synced through third party cloud services.
This is the worst case scenario. It is also entirely preventable. Back up before you reset.
When You Absolutely Should Not Reset Your iPhone
There are situations where hitting that reset button is the worst thing you can do.
Your iPhone is acting slow but otherwise works fine.
A reset will not make an old phone feel new again. iOS slowdowns are usually caused by low storage space, outdated apps, or an aging battery. Go to Settings > Battery > Battery Health first. If your maximum capacity is below 80 percent, a battery replacement will do more for performance than a reset ever could.
Check your storage too. If you have less than 5GB free, the phone slows down to manage writes to the flash memory. Delete some files instead of wiping everything.
You are traveling and this is your only device.
Do not reset your iPhone in a hotel room or at an airport. If something goes wrong, you lose your maps, boarding pass, hotel confirmation, and ability to call for help. Wait until you are home with a reliable Wi-Fi connection and a computer nearby.
You have not verified your eSIM reactivation process.
If your phone uses eSIM only, confirm with your carrier exactly how to get your service back before you wipe the phone. Some carriers make you visit a physical store. Others require a phone call to a support line that might be closed.
You are not sure whether you have a backup.
If you cannot say with certainty that you have a recent backup, you do not have one. Check it. Do not guess.
A backup from six months ago is better than nothing, but you will lose everything created in those six months.
You are frustrated and just want to nuke it.
Resetting out of frustration is how people lose irreplaceable data. Take a breath. Walk away from the phone for an hour.
Come back and check your backup status with a clear head.
What About iCloud vs Local Backups? Which One Should You Use?
This is a decision you need to make before you ever need to restore. Both methods work. But they have tradeoffs that matter.
iCloud backup pros and cons
| Pros | Cons |
|---|---|
| No computer required | Slower restore over Wi-Fi |
| Automatic daily backups | Limited to 5GB free storage |
| Works anywhere with Wi-Fi | Paid plans cost $0.99 to $9.99 per month |
| Encrypted by default | Takes 2 to 6 hours to restore |
| Includes Health data and Keychain | Requires stable internet |
iCloud backup is the best option for most people. It runs automatically every night. You do not have to think about it.
The restore process is simple. Sign in to iCloud during setup and pick the backup you want.
The downsides are speed and cost. If you have more than 5GB of data, you need to pay for iCloud storage. And restoring over Wi-Fi is slow.
iTunes/Finder backup pros and cons
| Pros | Cons |
|---|---|
| Much faster restore over USB | Requires a computer |
| No storage cost or limits | Must remember to back up manually |
| Encrypted option saves everything | Backup file takes space on your hard drive |
| Full restore in 20 minutes to 2 hours | One drive failure loses your backup |
| Works without internet | Requires a cable or Wi-Fi sync |
Local backups are faster and free. If you have a computer, this is the more reliable option. You have full control over when backups happen.
The encrypted backup option captures everything.
The downside is that you have to remember to do it. If your computer crashes or you lose the hard drive, the backup is gone.
Which one is right for you?
Use iCloud backup if you do not own a computer, if you travel frequently, or if you want automatic backups. Pay the $0.99 per month for 50GB of storage. It is worth it.
Use iTunes/Finder backup if you have a computer, if you want the fastest possible restore, or if you are selling your phone and need to ensure the backup includes Health data and saved passwords.
Best case scenario: use both. Let iCloud handle automatic daily backups. Run a local encrypted backup before any major reset.
That way you have two independent copies of your data.
The Tools You Actually Need for a Safe Reset
You do not need much. But having the right things ready makes the process smooth.
A computer with enough free hard drive space.
If you plan to use iTunes or Finder, your computer needs enough free space to store the backup file. A full backup of a 128GB iPhone takes about 40 to 60GB of disk space after compression. A 256GB phone takes 80 to 120GB.
A USB cable that actually works.
Many third party USB cables charge your phone but do not support data transfer. If you plug your phone into your computer and nothing shows up in Finder or iTunes, the cable is the problem. Use the cable that came with your iPhone or a certified MFi cable.
Stable Wi-Fi internet.
For iCloud backups and restores, your connection needs to stay active for potentially hours. If your Wi-Fi drops mid restore, the process pauses and resumes. But a long interruption can cause errors.
A power source.
Your phone needs to stay on during the entire backup and restore process. Plug it into a wall charger. A phone that dies mid restore can end up in recovery mode.
Your Apple ID password.
You will need this during setup after the reset. If you have forgotten it, reset it through Apple's iForgot website before you erase the phone.
Two factor authentication backup codes.
If you use two factor authentication with your Apple ID, Apple provides recovery codes when you set it up. Find those codes. If you lose access to your trusted devices and phone number, those codes are the only way back into your account.
What Happens During the Erase Process (The Technical Side)
Understanding what actually happens when you tap Erase All Content and Settings helps you trust the process. It is not magic. It is cryptography.
Your iPhone uses hardware encryption. Every piece of data written to the phone's storage is automatically encrypted using keys stored in the device's Secure Enclave. The Secure Enclave is a dedicated processor on the iPhone's main chip.
It is isolated from the main operating system.
When you choose Erase All Content and Settings, the phone does not go through every file and delete it one by one. That would take hours. Instead, it destroys the encryption keys inside the Secure Enclave.
Without those keys, all the data on the flash storage becomes unreadable random noise.
Think of it like a locked filing cabinet full of documents. Instead of burning every document, you just melt the key. The documents are still there.
But nobody can ever read them again.
This is why the erase process only takes a few minutes. The phone does not overwrite your photos, messages, or apps. It just makes them permanently inaccessible.
New data written to the phone after the reset will eventually overwrite the old encrypted data. But from a practical standpoint, your old data is gone the moment the erase completes.
This is also why data recovery services cannot help you after an iPhone reset. On a traditional hard drive, deleted files can be recovered until they are overwritten. On an iPhone with hardware encryption, there is nothing to recover.
The keys are gone.
How to Verify Your Backup Actually Works
Creating a backup is step one. Confirming that backup is restorable is step two. This is the step most people skip.
You do not want to discover your backup is corrupted while you are standing in front of a freshly wiped iPhone.
For iCloud backups.
Go to Settings > Your Name > iCloud > iCloud Backup. You will see the date and time of the last backup. Tap it.
You will see a list of what was included: Photos, Messages, Health, and each app that contributed data. If any app shows "Not Included," that app's data is not in the backup.
You can also check the size of the backup. Tap Manage Storage under the iCloud Backup section. You will see your device listed with its backup size.
If the size seems too small (under 1GB for a phone with lots of photos), something is wrong. A proper backup of a phone with 64GB of data typically ranges from 10 to 25GB.
For iTunes/Finder backups.
Open Finder or iTunes. Click on your iPhone. Look for the Backups section.
You will see the date, time, and size of the last backup. For an encrypted backup, the size will be larger because it includes Health data and Keychain items.
You can also try a partial restore test. In Finder or iTunes, hold the Option key (Mac) or Shift key (Windows) while clicking Restore Backup. This shows you a list of available backups with their dates and sizes.
You do not have to actually restore. Just seeing the backup listed confirms the file exists and is readable.
What to do if the backup fails.
Backup failures happen for common reasons. iCloud backups fail when you run out of iCloud storage. Free up space by deleting old backups of devices you no longer own. Go to Settings > Your Name > iCloud > Manage Account Storage > Backups.
Tap any old device and delete its backup.
iTunes backups fail when your computer runs out of hard drive space. Free up disk space and try again. They also fail if the USB cable loses connection mid backup.
Use a short, high quality cable and keep the phone still.
If a backup repeatedly fails, the problem is often a corrupted file on the phone itself. Try excluding certain app data from the backup. Go to Settings > Your Name > iCloud > Manage Account Storage > Backups > Your Device.
Tap Show All Apps and toggle off large apps you do not need backed up. Then try again.
Frequently Asked Questions
Will I lose my photos if I reset my iPhone?
It depends on two things. First, did you have iCloud Photos turned on? If yes, your photos are safe in the cloud and will download after you sign in.
Second, did you create a backup before resetting? If you have a recent iCloud or iTunes backup, your photos restore completely. Without either, your photos are gone.
Does resetting an iPhone delete everything permanently?
Technically no. iOS uses encrypted storage. When you erase all content and settings, the phone destroys the encryption keys that make your data readable. The actual data remains on the flash storage chips.
But it is scrambled and useless without those keys. For practical purposes, your data is gone and unrecoverable.
Can I reset my iPhone without losing my contacts?
Yes. Your contacts are synced to your email provider or iCloud. They are not stored exclusively on the phone.
Even after a full factory reset, signing into your iCloud, Gmail, or Outlook account brings your contacts back automatically. The same applies to calendars and reminders.
What happens if I reset my iPhone and forgot my Apple ID password?
You have a problem. After an Erase All Content and Settings, Activation Lock kicks in if Find My iPhone was on. The phone will ask for the Apple ID and password that were last used on it.
If you cannot provide them, the phone is locked. Contact Apple Support with proof of purchase to unlock it. Without proof, the phone is unusable.
How do I reset my iPhone without losing my data?
Use Reset All Settings instead of Erase All Content and Settings. This option is under Settings > General > Transfer or Reset iPhone > Reset > Reset All Settings. It clears your preferences and saved networks but leaves photos, messages, apps, and media untouched.
If you need a full factory reset, back up first, then restore after the erase.
Final Decision Guide: Should You Reset or Not?
Based on your specific situation, here is exactly what you should do.
You are selling or trading in your iPhone.
Back up to iCloud or iTunes. Sign out of iCloud and turn off Find My. Then use Erase All Content and Settings.
The buyer gets a clean phone. You restore your data to your new iPhone from the backup.
Your iPhone is acting glitchy after an update.
Start with Reset All Settings. This fixes most post-update weirdness without losing any data. If that does not work, try Erase All Content and Settings with a backup and restore.
If the problem persists after a full restore, it is likely a hardware issue.
You forgot your passcode.
You cannot reset through the Settings app because you cannot unlock the phone. You need a computer. Put the iPhone into recovery mode and restore it through Finder or iTunes.
This erases the phone and allows you to set it up as new or from a backup.
You want to clear storage space without losing anything.
Do not reset at all. Go to Settings > General > iPhone Storage. Review the recommendations.
Offload unused apps. Delete large attachments in Messages. Clear Safari cache.
A reset is overkill for a storage problem.
You are giving your phone to a family member.
Same as selling. Back up. Sign out of iCloud.
Turn off Find My. Erase All Content and Settings. The family member sets it up with their own Apple ID.
Your iPhone is stuck in a boot loop.
Try a force restart first. Press and release Volume Up. Press and release Volume Down.
Hold the Side button until the Apple logo appears. If that fails, put the phone into recovery mode and restore through a computer. If recovery mode fails, use DFU mode.
You just want a fresh start but plan to keep the phone.
Back up first. Then use Erase All Content and Settings. During setup, choose Set Up as New iPhone instead of restoring from a backup.
You get a clean phone. Your photos and contacts come back through iCloud sync if you turn those on. Everything else starts from scratch.
The decision always comes back to one question. Do you have a backup? If yes, you are safe.
If no, do not reset until you create one. It is that simple.

Similar Posts